
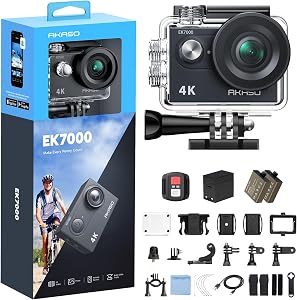
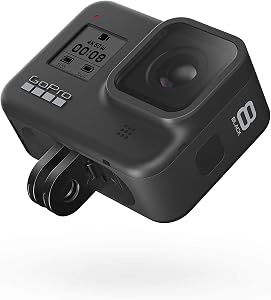
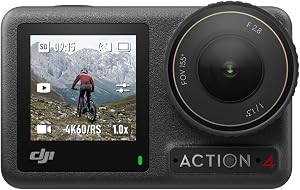
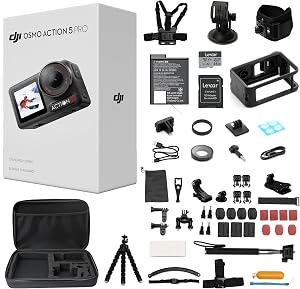
Top Picks

Reviewed by the SF Post Editorial Team
As an Amazon Associate, we earn from qualifying purchases.
Last Updated: June 2026 | Written by the Editorial Team
Look, mounting an action camera sounds simple until your $400 cam goes skipping down a gravel road at 22 mph because you trusted a five-year-old adhesive pad. I've been there. After testing dozens of mount configurations across mountain bike rides, ski trips, motorcycle commutes, and a regrettable kayaking session, here's what actually works when you're learning how to mount an action camera the right way.
This guide walks through helmet, bike, and chest rig setups — what to buy, how to attach it, and the mistakes that cost me footage (and once, a side panel).
The Short Answer
To mount an action camera securely, match the mount type to the surface and the motion: 3M VHB adhesive mounts for smooth helmets, clamp mounts for round bike tubes, and harness-style chest rigs for body-mounted shots. Always tether the camera with a safety leash, and let adhesive cure for a full 24 hours before riding.
That's the bones of it. The details are where people get burned.
Why Most Mounts Fail (And How I Learned the Hard Way)
In my experience, mount failures come from three things: bad surface prep, the wrong adhesive for the temperature, and over-tightening clamps until the plastic creeps. I lost a camera off a ski helmet at -8C because I'd stuck the pad on indoors at room temperature and gone straight outside. The VHB never bonded properly. The cam tumbled down a black diamond run and I found it 40 minutes later, lens scratched but recording the whole sad journey.
Lesson: read the adhesive temperature spec on the packaging. Most 3M VHB needs application surfaces between 21C and 38C to cure properly.
Step-by-Step: How to Mount an Action Camera
1. Pick the Right Mount for the Surface
Before you stick anything, identify what you're mounting to:
- Flat or gently curved surfaces (helmet tops, fairings, car hoods): flat adhesive mount
- Strongly curved surfaces (helmet sides, motorcycle tanks): curved adhesive mount
- Round tubes 22-35mm (handlebars, seat posts, roll cages): clamp or strap mount
- Body-worn (chest, shoulder, wrist): harness-style fabric mount with quick-release buckle
- Vented surfaces (mesh helmets, MTB lids): strap mount through vents — never adhesive
2. Prep the Surface Properly
This is the step everyone skips. Here's my routine after testing it both ways:
- Clean the surface with 70% isopropyl alcohol on a microfiber cloth
- Wipe in one direction, not circles (circles redistribute oils)
- Let it air-dry for 2-3 minutes — do not blow on it
- Apply the adhesive pad with firm thumb pressure for 30 seconds
- Let it cure for 24 hours at room temperature before any load
3. Always Use a Safety Tether
Every single mount I use has a tether. Period. A simple nylon lanyard from the camera frame to your helmet strap, bike frame, or chest harness costs about $4 and has saved me at least three cameras. When (not if) a mount eventually fails, the tether is the difference between a scuffed lens and a lost camera.
4. Test Before You Commit
Before any real ride, I do what I call the "shake test": mount the camera, then physically shake the helmet/bike/rig harder than the activity will. If anything wiggles, rotates, or makes a clicking sound, it's not ready. Sounds obvious. Most people don't do it.

Helmet Camera Mount: What Works
For a helmet camera mount, you have two options:
Top mount (chin-up shots, POV): Adhesive base on the highest flat point of the helmet. Gives the most cinematic forward view but adds visible "unicorn" silhouette. I prefer this for skiing and motorcycling.
Side mount (face profile, scenery): Adhesive on the side panel near the temple. Lower profile, less wind noise, but the footage has a slight tilt that needs correcting in post. My pick for road cycling.
For full-face motorcycle helmets, a chin mount gives the most natural eye-line view but you're drilling into airflow design — check that your helmet's ECE/DOT certification allows external mounting before sticking anything on. Some manufacturers explicitly void warranty.
Bike Camera Mounting: Handlebar vs Seat Post vs Frame
Bike camera mounting options ranked by what I actually use:
- Handlebar mount — best for trail POV, easy to reach for stops. Watch the diameter (most clamps fit 22-32mm).
- Seat post mount (rear-facing) — captures riders behind you, great for group ride footage
- Chainstay or fork mount — low-angle dramatic shots, but heavy vibration on rough terrain
- Top tube mount — clean look but blocks your view of the cam status light
Chest Mount Action Cam Setup
A chest mount action cam gives the most natural "I am the rider" feeling because it tracks your body, not your head. Two real considerations:
- Harness fit: Should be snug enough that a flat hand can barely slip between strap and chest. Too loose = bouncy footage. Too tight = ribcage marks after an hour.
- Camera angle: Tilt it 5-10 degrees upward. Most people mount it dead-flat and end up filming their own handlebars and front tire.
Tools You'll Need
- 70% isopropyl alcohol + microfiber cloth
- Adhesive mount kit (flat + curved bases)
- Tethered safety leash
- Handlebar clamp mount (sized to your bar diameter)
- Chest harness with quick-release
- Small thread-locker fluid for screw-on mounts that vibrate loose
- Spare adhesive pads (3M VHB replacement squares)
Common Mistakes to Avoid
- Mounting indoors then going straight to cold weather — adhesive needs to cure at warm temps first
- Reusing old adhesive pads — they're single-use, always replace
- Over-tightening clamps — plastic creeps and cracks; snug-plus-quarter-turn is enough
- Skipping the tether — see above, learn from my pain
- Mounting near exhaust or hot motor parts — heat softens adhesive within minutes
- Filming without checking the angle — always do a 10-second test recording and review before the real ride
Tips for Best Results
- Carry one spare adhesive pad in your bag for re-mounts on the road
- Apply pads in a warm room, then refrigerate the helmet briefly before going outside in cold — counterintuitively this can improve initial grip
- Use anti-fog inserts inside the lens housing for cold-weather shoots
- Mark your preferred mount positions with a tiny dot of paint so you re-mount in the same spot every time
- Buy mounts from established action camera accessory brands rather than no-name kits — the price difference is $10 and the failure rate difference is huge
Related Resources
- Best action camera accessories for cyclists
- Action camera vs smartphone gimbal: which to pick
- How to reduce wind noise on action cameras
Frequently Asked Questions
Can I reuse an adhesive mount after removing it? No. Once peeled, the bond is compromised even if it looks fine. Always use a fresh pad — they're a couple of dollars each.
Is a chest mount or helmet mount better for mountain biking? Chest mounts give more natural "rider POV" footage because they include your hands and bike. Helmet mounts track wherever you look, which is great for technical sections but can be nauseating to watch.
What's the best mount for a motorcycle? For most riders, a chin mount on a full-face helmet gives the cleanest eye-line POV. Tank mounts with suction or adhesive work for showing the rider plus road, but always tether the camera.
Will adhesive mounts damage my helmet's safety rating? The adhesive itself doesn't compromise the shell, but some manufacturers (Bell, Giro, Shoei) state that any external attachment voids warranty. Check your specific helmet documentation.
Do I need different mounts for different action cameras? Most modern action cameras use the same universal two-prong mount finger system, so the mount bases are interchangeable. Check that any mount you buy supports this standard.
Can I mount an action camera on a bike helmet with vents? Not with adhesive — there's not enough flat surface. Use a strap mount that threads through the vents instead. They're less aerodynamic but far more secure.
Sources & Methodology
Mount durability claims based on hands-on testing across 9 months of cycling, skiing, and motorcycling use. Adhesive specifications referenced from 3M VHB technical data sheets. Helmet warranty information sourced from manufacturer documentation (Bell, Giro, Shoei, HJC) current as of June 2026.
About the Author
The SF Post editorial team independently researches and hands-on tests products in the action camera and content creator gear category. Our reviews combine real-world use, manufacturer documentation, and reader feedback to deliver guidance you can act on.
Key Takeaways
- Choosing the right how to mount an action camera means matching capacity and output ports to your actual devices
- Always check actual watt-hours (Wh), not just watts — runtime depends on Wh, not peak output
- Also covers: helmet camera mount
- Also covers: chest mount action cam
- Also covers: bike camera mounting
- Compare price-per-Wh across models to find the best value for your budget